Archive for March, 2010

Installing Revit on a Mac

I recently installed Revit 2010 on a MacBook Pro.  The MacBook had Boot Camp installed and also VMWare Fusion 3.  The install went onto the Boot Camp partition fairly easily.  The Boot Camp partition was Windows XP.  I installed Revit 2010 on my laptop with Windows 7 – so I am testing it out on that also.

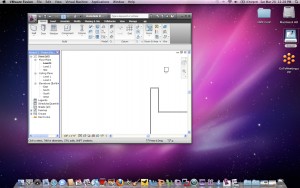
Using Boot Camp is better with VMware Fusion. I no longer have to choose between Windows and Mac at startup. I can run my Windows partition side-by-side with the Mac OS. VMware Fusion automatically recognizes my Boot Camp partition and lets me run it concurrently with the Mac. I can also run it in Unity mode which makes the partition sit right alongside my Mac programs as if it were part of the Mac OS.

You can also go to Full Screen to see the entire Revit program.  Just click on the VMWare option…

Boot Camp supports the 32-bit releases of Microsoft Windows XP and Windows Vista. You can run either operating system on your Mac at native speed by booting into the Windows environment.

Boot Camp Assistant creates a partition just for Windows XP without erasing your existing Mac OS X information.  The drivers are automatically installed after installing Windows when you insert the disc into your Macintosh.

After running Boot Camp and installing Windows XP or Vista, you can switch between Windows and Mac OS X by holding the Option (Alt) key at start up.

When you start your Mac, holding down the Options (Alt) key, it will offer you the bootable partitions.  Select Windows to boot directly into Windows.

I have noticed that the direct boot method is best for long term work.  Quick checks of models in Revit can be done via VMWare, but it is much slower than a direct Windows boot.
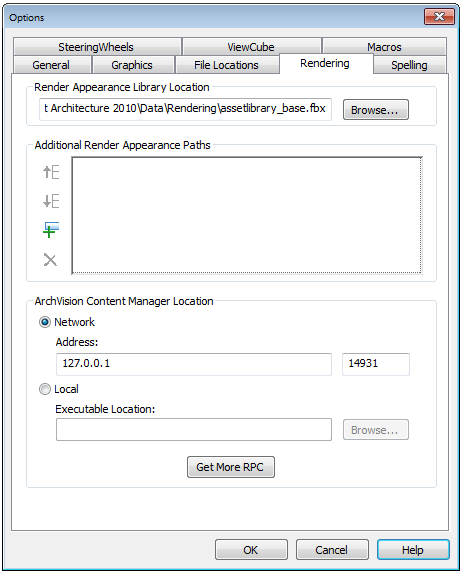
Revit Options 2010 – Rendering Tab

Click the Rendering tab of the Options dialog to specify paths for files used for render appearances and decals, and to specify the location of the ArchVision Content Manager (ACM), if needed.

Render Appearance Library Location

If you move the Render Appearance Library from its default location, use the Rendering tab of the Options dialog to specify its new location.

The Render Appearance Library is a read-only library that stores all render appearances for materials, the default RPC content provided with the software, and related rendering information.

When you install Revit Architecture, this library resides in the following default location:

C:\Program Files\ <product name and version>\Data\Rendering\assetlibrary_base.fbx

If necessary, you can move the Rendering folder but I would not advise that – it just clutters up your install and updates.

Additional Render Appearance Paths

You can specify paths for the following:

  • Image files used to define a custom color, design, texture, or bump map for a render appearance.
  • Image files for decals.
  • Additional RPC content that is stored in a common network location.

Note: You only need to specify paths for additional RPC content that you license directly from ArchVision. You do not need to specify paths for the RPC content that Revit Architecture provides.

Suppose you specify image files for render appearances and decals. When Revit Architecture needs to access the image file, first it looks in the location specified for the file, using the absolute path. If it cannot find the file in that location, Revit Architecture then searches the paths that you specify in this list, in the order in which the paths are listed.

What is RPC?   Revit Architecture includes ArchVision realpeople for more realistic renderings. ArchVision realpeople are pictures of actual people and objects from multiple angles that display using a technique called image-based rendering. They are part of ArchVision’s RPC (Rich Photorealistic Content) product family.

ArchVision Content Manager Location

The bottom portion of this dialog box relates to additional RPC content that you can purchase and use.

Revit Architecture provides many RPC objects that you are licensed to use in rendered images for Revit projects. If you purchase additional RPC content, you must use the ArchVision Content Manager (ACM) to manage it.

Note:  Use the ACM only to manage additional RPC content that you purchase from ArchVision. You do not need to use the ACM for the RPC content that is provided with Revit Architecture.

Click on the Get More RPC toopen up a web page for purchasing or trying out more content…

Autodesk BIM Deployment Plan

Autodesk has just provided a BIM Deployment Plan that is similar to others I have seen but is very much worth the read.

Here is the link…  http://usa.autodesk.com/adsk/servlet/item?id=14652957&siteID=123112

The Autodesk BIM Deployment Plan offers tools and guidance for building industry professionals interested in implementing Building Information Modeling (BIM). Tools offered in this resource provide a practical framework for AEC stakeholders, and can be used by individual organizations on specific projects. The BIM Deployment Plan includes:

  • BIM support materials for owners, architects, engineers, and contractors
    Templates to streamline multi-discipline communications
    Recommendations for roles and responsibilities
    Best business process examples
    Software suggestions for an effective BIM environment

Revit Options 2010 – File Locations Tab

Click the File Locations tab of the Options dialog to set paths for files and directories.

Files and Directories

Default template file:

Specify the path for the default template file. The Revit Architecture installation automatically sets this path; however, you may want to change it if you need to use either Imperial or Metric units for your project. There are default templates installed in either Revit Architecture\Imperial Templates\ or Revit Architecture\Metric Templates. Select whichever one is appropriate. Also, you can change this path to point to a custom template to use for all your projects.  Just click Browse and pick a new one.

Default path for user files:

Specify the default project path where Revit Architecture saves the current file. This setting overrides the default path for saving files. When you specify a folder, Revit Architecture opens that folder by default when you save or open a file.

Default path for family template files:

Specify the path for the templates and libraries. The Revit Architecture installation automatically sets this path; however, you may want to change it if you need to use either Imperial or Metric families for your project. There are default templates installed in either Revit Architecture\Imperial Library\ or Revit Architecture\Metric Library.

Add secondary libraries that may be specific to your company. To do this, click Places. In the Places dialog, enter the library name, click in the field for Library Path, and click the browse button. Navigate to the appropriate folder, and click OK.

Each of the locations above can be edited to whatever you want.

Click the “+” sign to add you own.  Notice the HMC Library (which was added for my firms files).

You can move search paths up and down as needed with the buttons on the left.

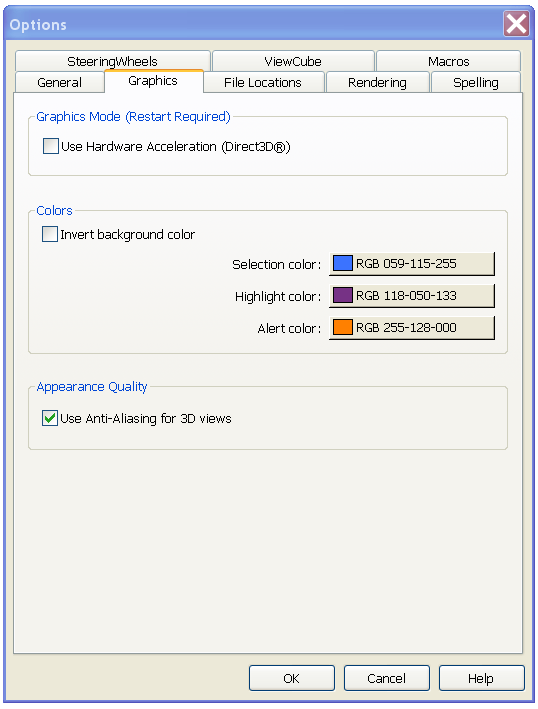
Revit Options 2010 – Graphics Tab

Click the Graphics tab of the Options dialog to enable hardware acceleration for improved display performance. On this tab you can also configure colors for selection, highlighting, and alerts, and enable anti-aliasing for 3D views.

Graphics Mode

Use hardware acceleration. Some of the benefits of using hardware acceleration are:

  • Faster display of large models upon refresh.
  • Switching between windows of views occurs faster with 3D graphics acceleration.
  • Creation and modification of annotations is faster.

Colors

Select Invert background color to change the display of the background of the view and the elements in the view. Click this and apply to see the background change to black from white.
To define a new selection color, click the color button next to Selection Color. This option sets the color for items you select in the drawing area, either by clicking on them or using a pick box.
To define a new highlight color, click the color button next to Highlight Color. This option sets the color of highlighted elements (when you move the cursor over an element in the drawing area).
To define a different error color, click the color button next to Alert Color. This option sets the color for elements that are selected when a warning or error occurs.

Just leave these all as they are.

Appearance Quality

Use Anti-Aliasing for 3D views
When enabled, the quality of lines in 3D views is improved. For example, edges display smoother.

Related Posts with Thumbnails