Archive for March 23rd, 2010

Installing Revit on a Mac

I recently installed Revit 2010 on a MacBook Pro.  The MacBook had Boot Camp installed and also VMWare Fusion 3.  The install went onto the Boot Camp partition fairly easily.  The Boot Camp partition was Windows XP.  I installed Revit 2010 on my laptop with Windows 7 – so I am testing it out on that also.

Using Boot Camp is better with VMware Fusion. I no longer have to choose between Windows and Mac at startup. I can run my Windows partition side-by-side with the Mac OS. VMware Fusion automatically recognizes my Boot Camp partition and lets me run it concurrently with the Mac. I can also run it in Unity mode which makes the partition sit right alongside my Mac programs as if it were part of the Mac OS.

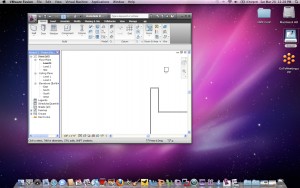
You can also go to Full Screen to see the entire Revit program.  Just click on the VMWare option…

Boot Camp supports the 32-bit releases of Microsoft Windows XP and Windows Vista. You can run either operating system on your Mac at native speed by booting into the Windows environment.

Boot Camp Assistant creates a partition just for Windows XP without erasing your existing Mac OS X information.  The drivers are automatically installed after installing Windows when you insert the disc into your Macintosh.

After running Boot Camp and installing Windows XP or Vista, you can switch between Windows and Mac OS X by holding the Option (Alt) key at start up.

When you start your Mac, holding down the Options (Alt) key, it will offer you the bootable partitions.  Select Windows to boot directly into Windows.

I have noticed that the direct boot method is best for long term work.  Quick checks of models in Revit can be done via VMWare, but it is much slower than a direct Windows boot.
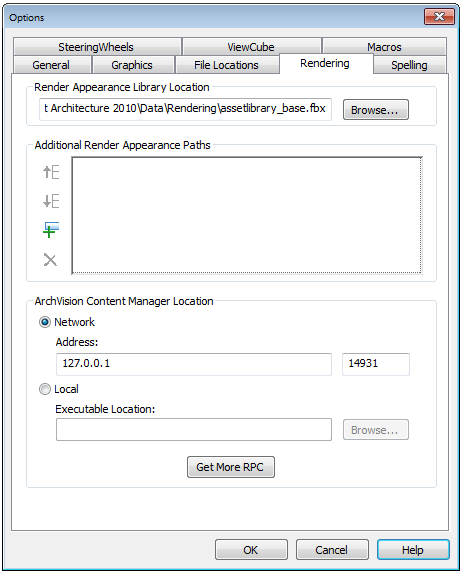
Revit Options 2010 – Rendering Tab

Click the Rendering tab of the Options dialog to specify paths for files used for render appearances and decals, and to specify the location of the ArchVision Content Manager (ACM), if needed.

Render Appearance Library Location

If you move the Render Appearance Library from its default location, use the Rendering tab of the Options dialog to specify its new location.

The Render Appearance Library is a read-only library that stores all render appearances for materials, the default RPC content provided with the software, and related rendering information.

When you install Revit Architecture, this library resides in the following default location:

C:\Program Files\ <product name and version>\Data\Rendering\assetlibrary_base.fbx

If necessary, you can move the Rendering folder but I would not advise that – it just clutters up your install and updates.

Additional Render Appearance Paths

You can specify paths for the following:

  • Image files used to define a custom color, design, texture, or bump map for a render appearance.
  • Image files for decals.
  • Additional RPC content that is stored in a common network location.

Note: You only need to specify paths for additional RPC content that you license directly from ArchVision. You do not need to specify paths for the RPC content that Revit Architecture provides.

Suppose you specify image files for render appearances and decals. When Revit Architecture needs to access the image file, first it looks in the location specified for the file, using the absolute path. If it cannot find the file in that location, Revit Architecture then searches the paths that you specify in this list, in the order in which the paths are listed.

What is RPC?   Revit Architecture includes ArchVision realpeople for more realistic renderings. ArchVision realpeople are pictures of actual people and objects from multiple angles that display using a technique called image-based rendering. They are part of ArchVision’s RPC (Rich Photorealistic Content) product family.

ArchVision Content Manager Location

The bottom portion of this dialog box relates to additional RPC content that you can purchase and use.

Revit Architecture provides many RPC objects that you are licensed to use in rendered images for Revit projects. If you purchase additional RPC content, you must use the ArchVision Content Manager (ACM) to manage it.

Note:  Use the ACM only to manage additional RPC content that you purchase from ArchVision. You do not need to use the ACM for the RPC content that is provided with Revit Architecture.

Click on the Get More RPC toopen up a web page for purchasing or trying out more content…

Related Posts with Thumbnails